Resources

Knowledge base

Changing the video thumbnail

Changing the thumbnail of a video allows you to quickly identify videos when you are browsing through Place. In order to change the thumbnail of one of your videos, follow these steps:

  1. Ensure you are in Place
  2. Locate the video asset that you would like to change the thumbnail for
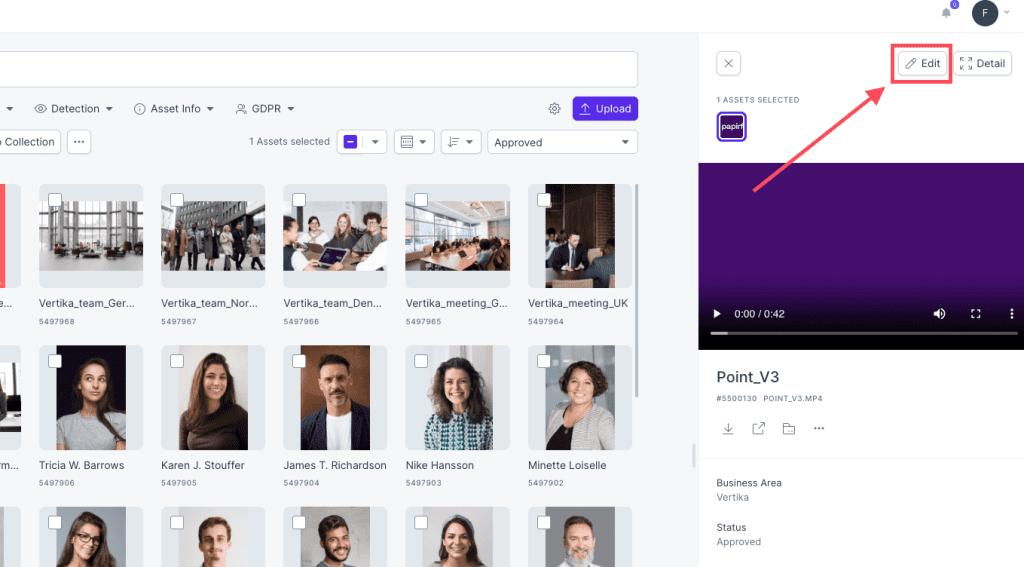
  3. Click on the asset, followed by edit in the upper right corner of the right hand sidebar as seen below
  1. From here, click on the three dots (options) and select change thumbnail
  2. Click-and-drag the slider to the part that you want to be the thumbnail for your video (see .gif below)
  3. After you have selected the frame you would like to have as your thumbnail, click change thumbnail to save the selection
  4. You have now changed the thumbnail
Resources

Knowledge base

Editing an asset

You might need to edit the meta-data of an asset or update the file after an initial upload. Here is an overview of how to update the data on existing assets.

Edit asset
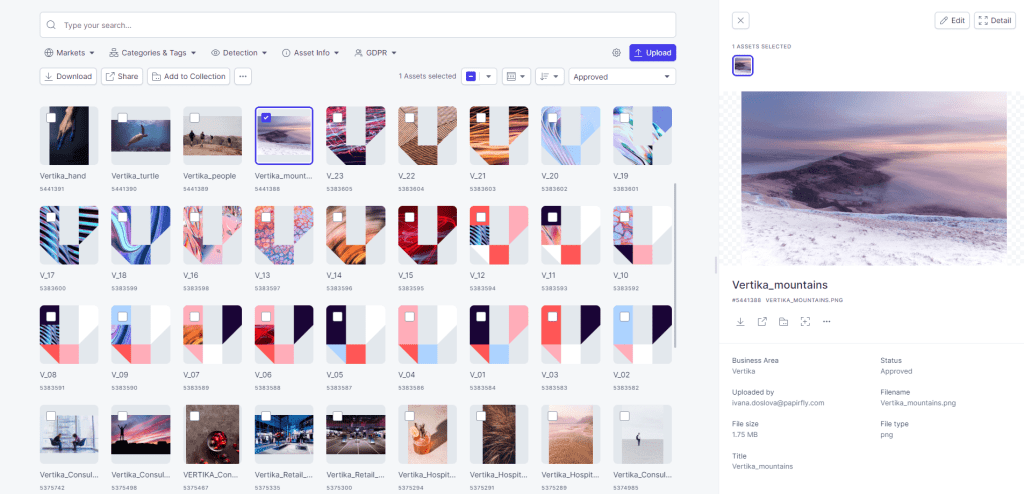
  1. Select an asset to open the preview panel
  2. Click the edit button to be able to edit the specific asset

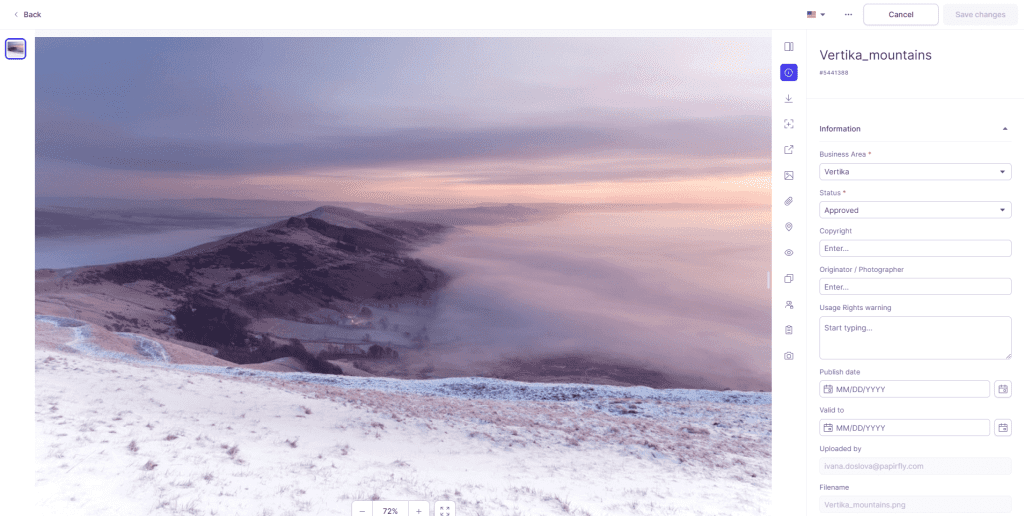
In the edit window there will be many fields available for you to edit. See the guides below to read more about each field.

Edit meta-data
  • In the meta-data tab you can change or add more meta-data in the same fields you were presented in the uploader. Example: Copryrights, dates, tags and categories.
Edit download & share

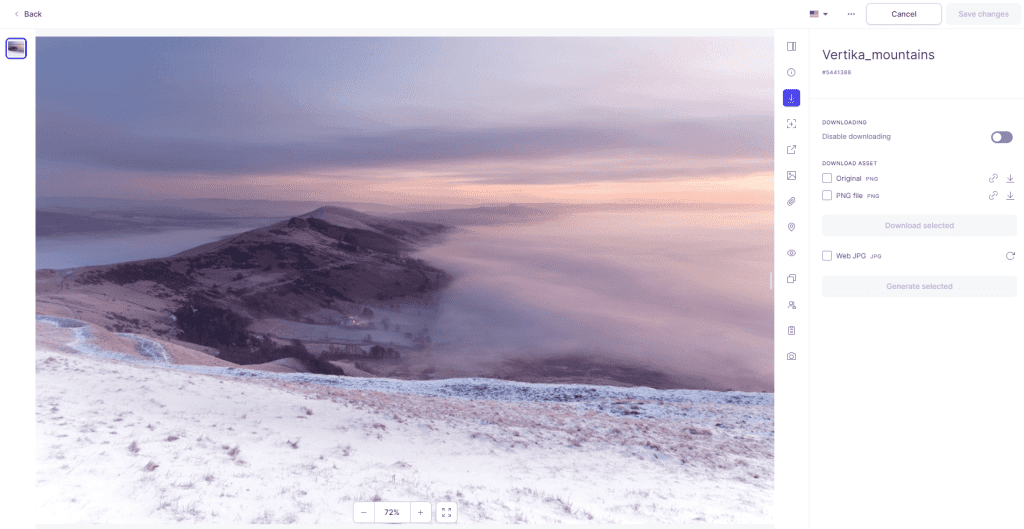
In the downloads tab you can restrict downloading as ad admin. You can also generate new version of an asset that has not yet been transcoded.

  • Downloads tab: In the downloads tab you can restrict downloading as ad admin. You can also generate new version of an asset that has not yet been transcoded
  • Restrict download: Restrict downloading of an asset for users without special rights (Only admins can download)
  • Untranscoded version: A list of available transcoding that have not been generated yet
  • Generate button: This button will become active when you select a checkbox for un-transcoded versions
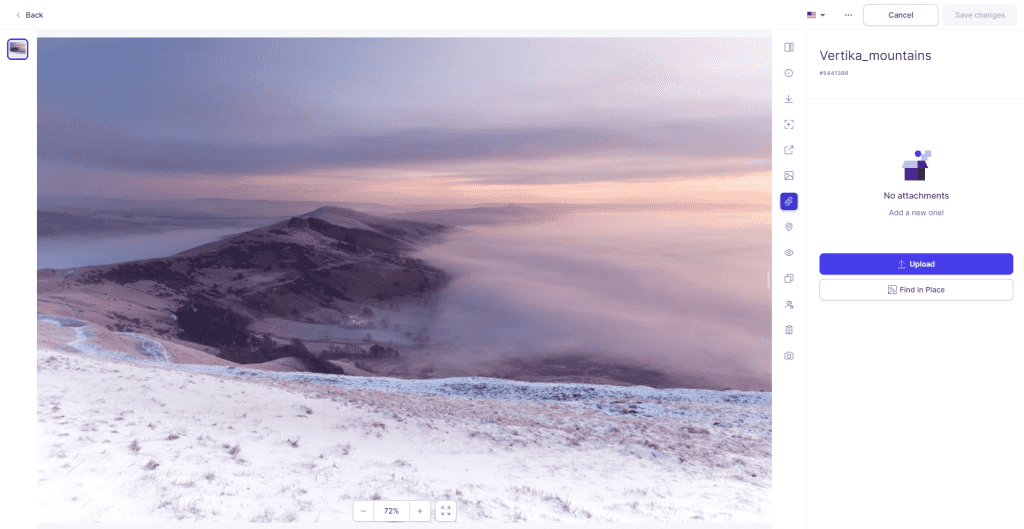
Edit attachments
  • Attachements tab: In the attachments tab you can add affiliated files.
  • Upload: Upload an attachment from your computer.
  • Find in Place: Connect an existing asset in a Place archive to this asset.
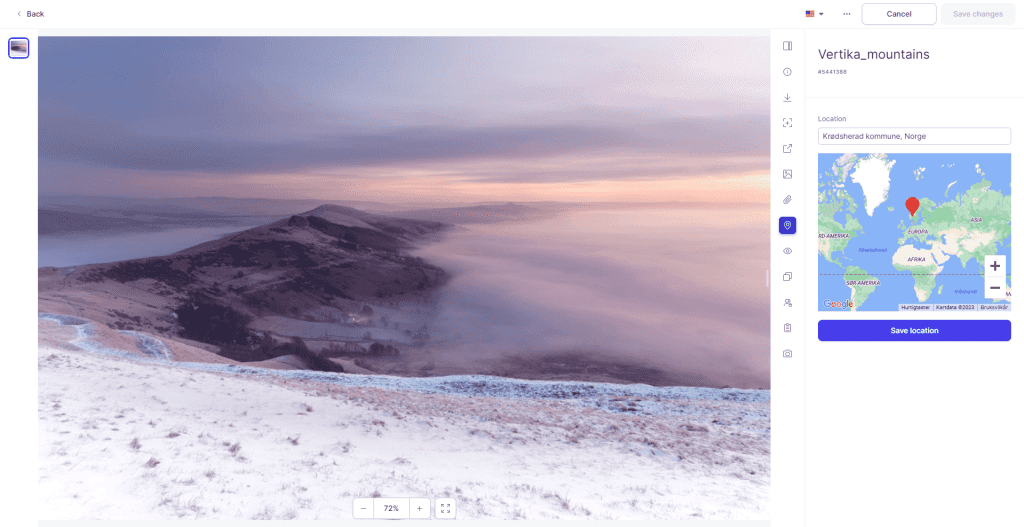
Edit location
  • Location tab: In the Location tab you can see geo-data on the asset. If there is no data available, you can set a location manually
  • Location field: Type in an address or an area to tag a location
  • Save location: Save the location added to the asset
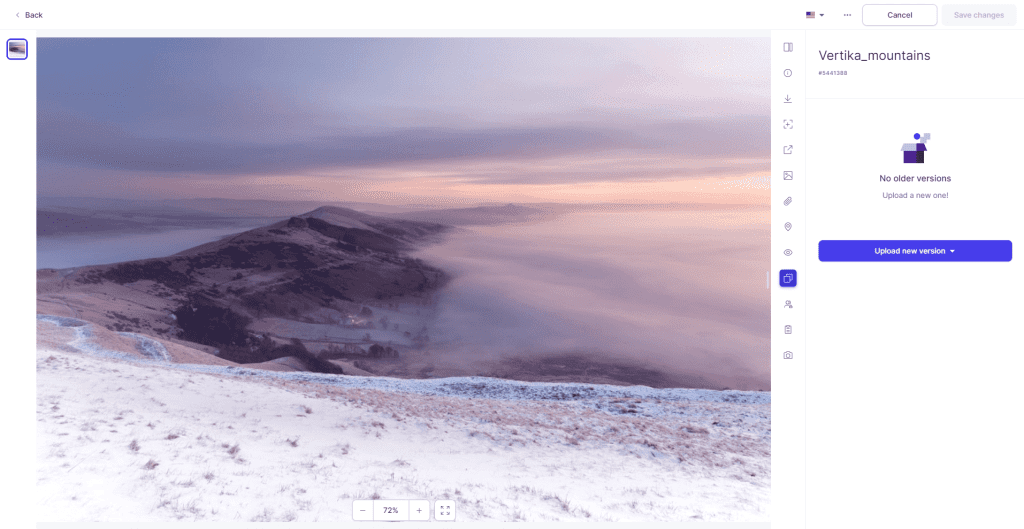
Edit version
  • Version tab: In this tab you can upload a new version of the asset to replace it. You can also choose to keep the older version in the history.
  • Upload new version: Click this button to browse for a new version on your computer
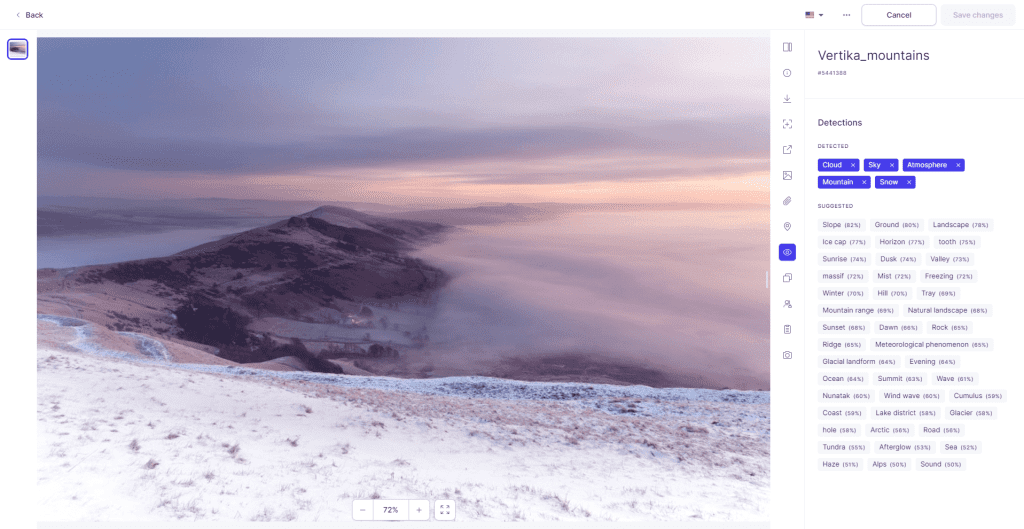
Edit detection

In the detection tab you can manage auto generated tags based in image analysis.

  • Approved tags: These tags have been automatically added to the asset. Each client can decide the threshold for auto approval of tags. A normal threshold would be 85% – 90% correctness.
  • Unapproved tags: Below the approved tags you will see all tags suggested from the AI. But these did not reach the approval threshold. You can review them and manually approve.
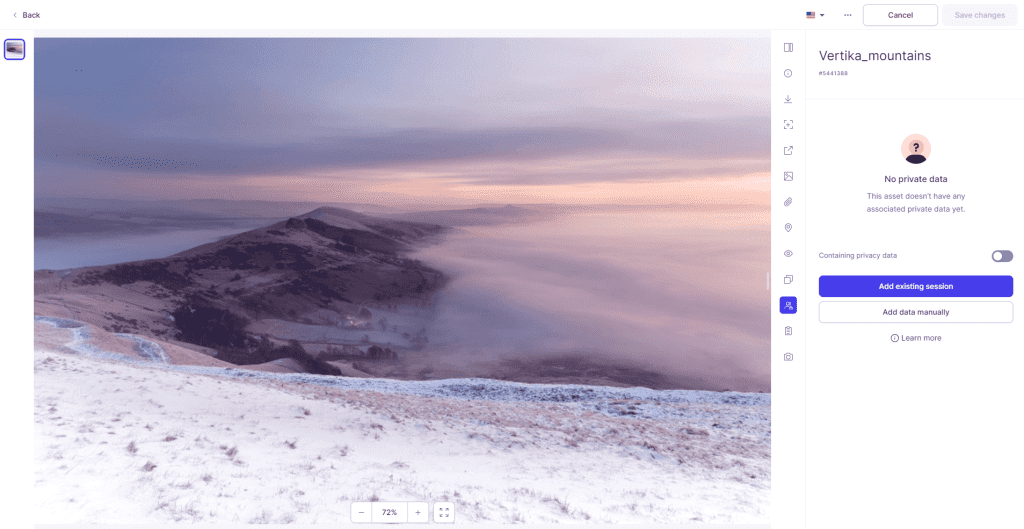
Edit privacy
  • Privacy tab: In the privacy tab you can manage connected photo sessions and photo subjects connected to an asset. Read more about this feature in the GDPR section

You can read more about GDPR here.

Resources

Knowledge base

Asset details/properties

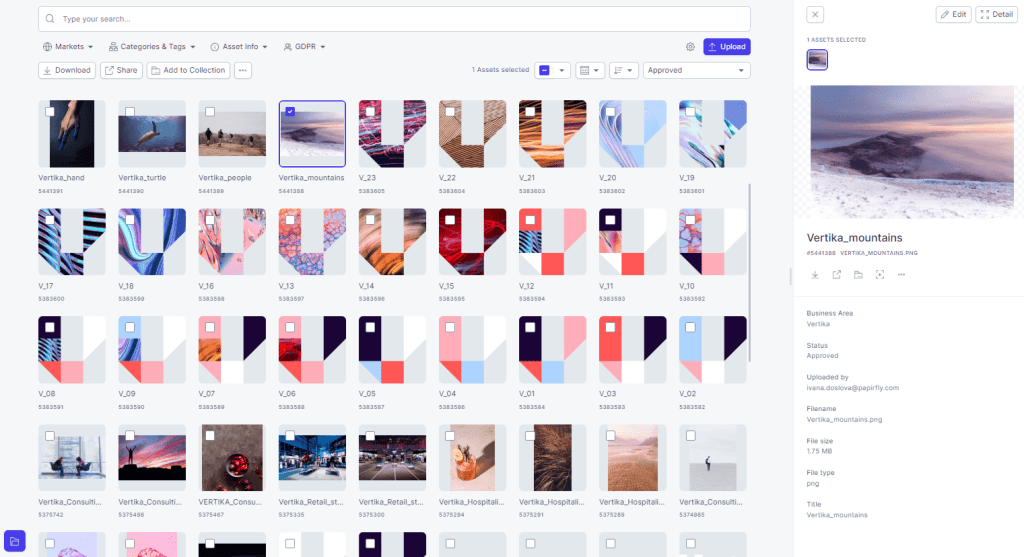
Selecting an asset will make the asset preview panel come out from the right-hand side. This will give you a larger preview of the asset, and show meta-data added by the uploader.

When selecting a single asset, the asset preview panel will appear in the right-hand side of the view.

  • Select asset: This button is available for editors. Click it to edit the asset. This button is available for editors. Click it to edit the asset.
  • Edit: The Details overview will show you an even larger preview of the file. You can also view all meta-data and extended information about the asset.
  • Details: Select what version of the asset you want to download.
  • Download: Quick link for sharing the asset externally
  • Share external: Add the asset to an archive specific collection, or a “Global” My collection.
  • Add to collection: Crop the image to another format.
  • Cropping: Open extended options for editors.
  • More options: Open extended options for editors.

Resources

Knowledge base

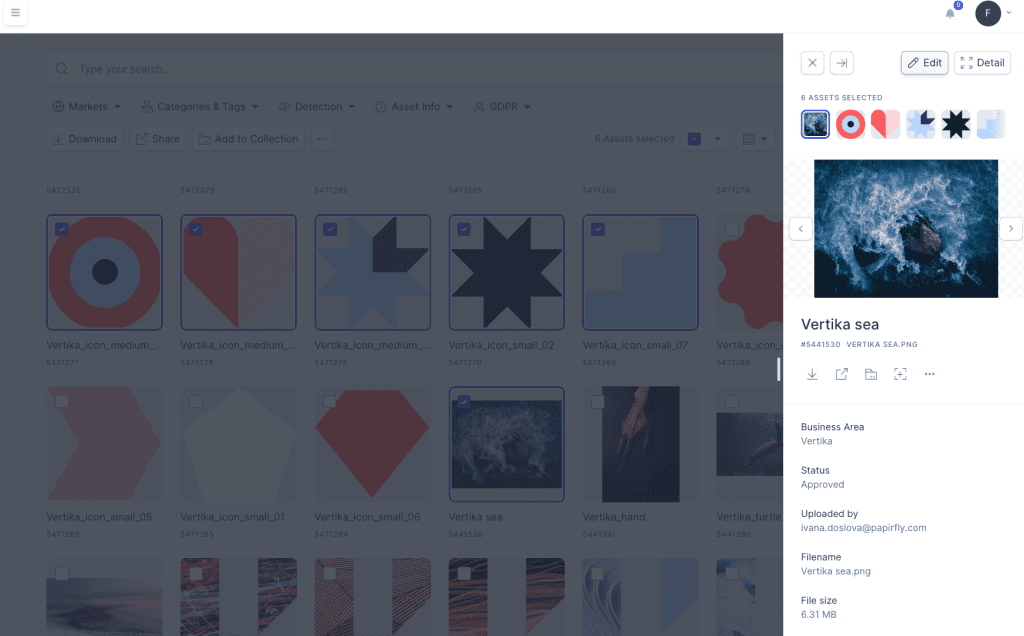
Editing multiple assets at the same time

To edit more than one asset at the same time, follow these steps:

  1. In the upper left corner of every asset, click on the Checkbox to mark the asset
  2. Click edit
  3. From here you can edit the assets by adding or editing elements such as:
    • Expiration date
    • Copyrights
    • Tags
    • More
  4. As soon as the changes have been made, remember to click save changes
  5. You have now edited the assets

Resources

Knowledge base

Deleting an asset

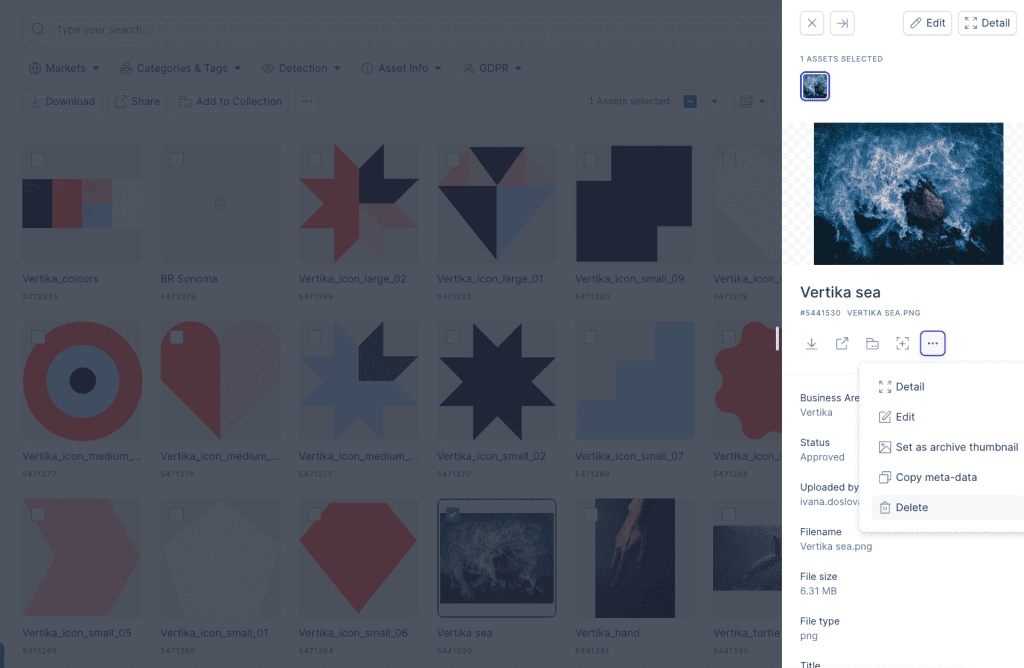
To delete/remove assets, follow these steps: 

Method one (best practice):
  1. Click on the asset you would like to delete and a new window will open
  2. In the right hand sidebar you will be presented with some options
  3. Click on the three dots right underneath the preview of the asset and a drop-down box will appear
  4. In this drop-down box, click delete
  5. The asset is now deleted
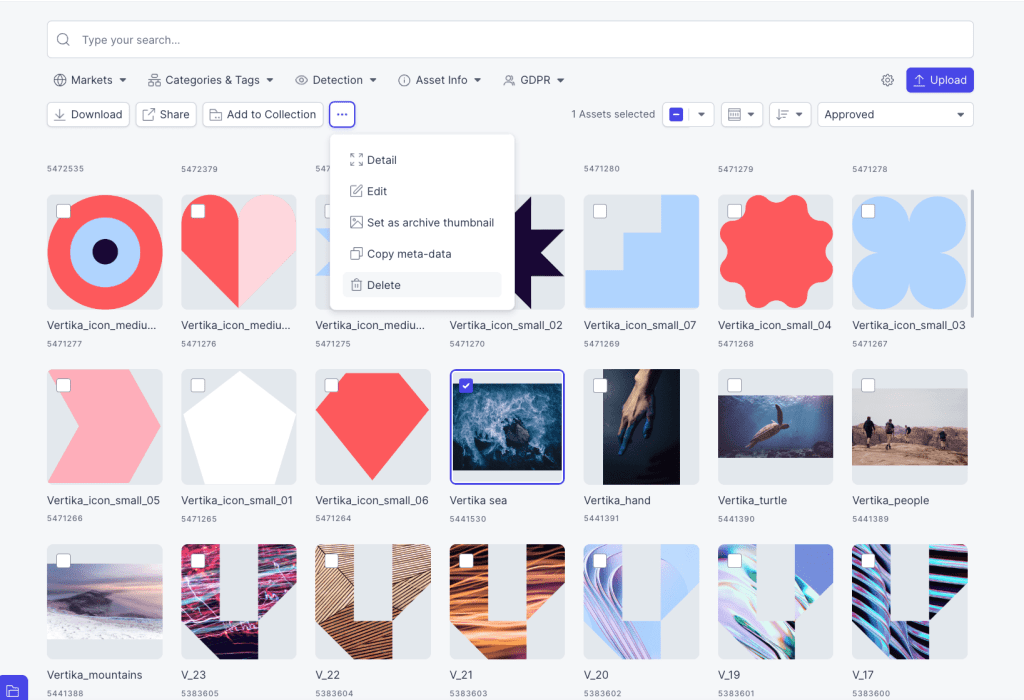
Method two:
  1. Locate the asset you would like to delete
  2. Mark the asset by checking the check-box in the upper left corner of the asset
  3. Click on the three dots to the left of the button called add to collection
  4. From the drop-down list, select Delete
  5. The asset is now deleted