Resources

Knowledge base

Changing the settings for the list view

In order to adjust the settings in the list view in co-op projects, follow these steps

  1. Navigate to the Co-op projects overview
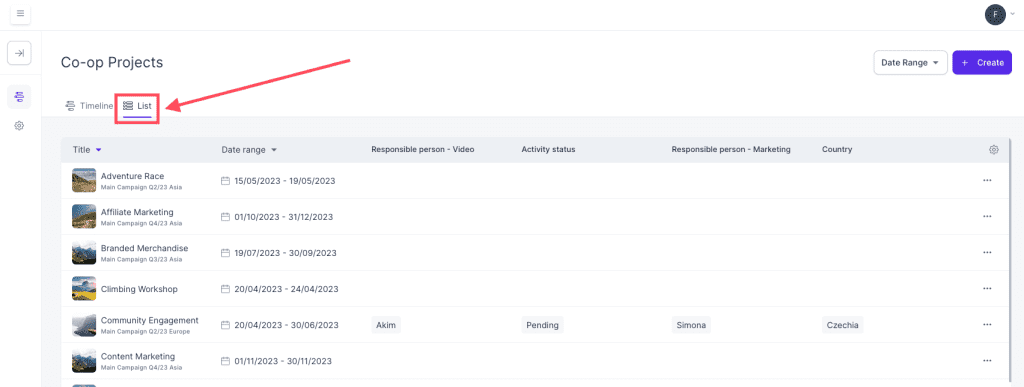
  2. Ensure you have activated list view by clicking on the button in the upper left corner in the overview
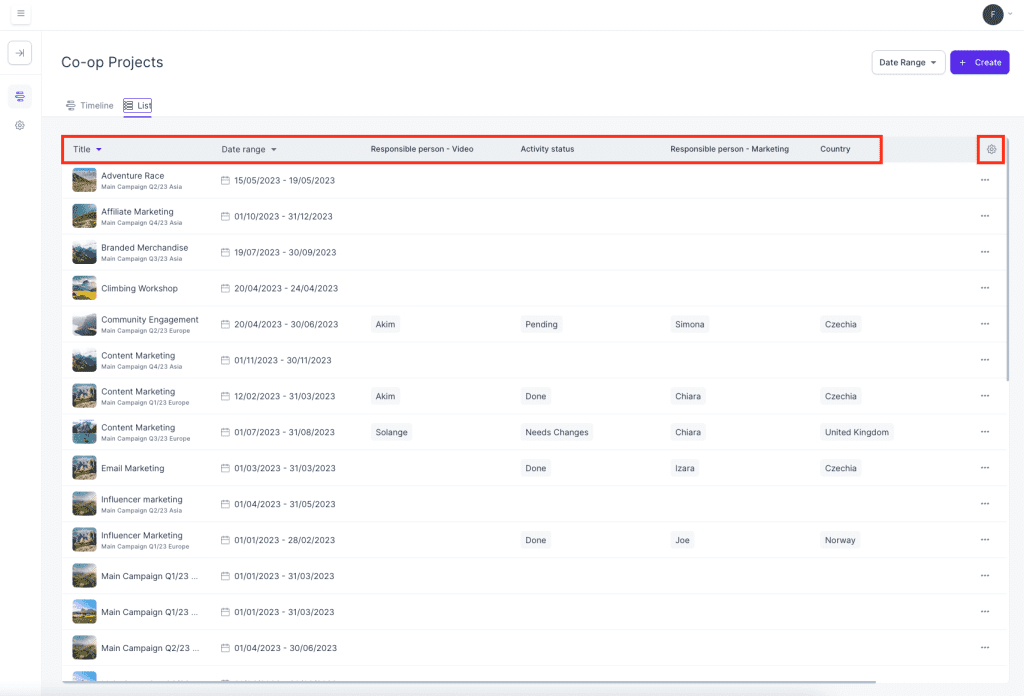
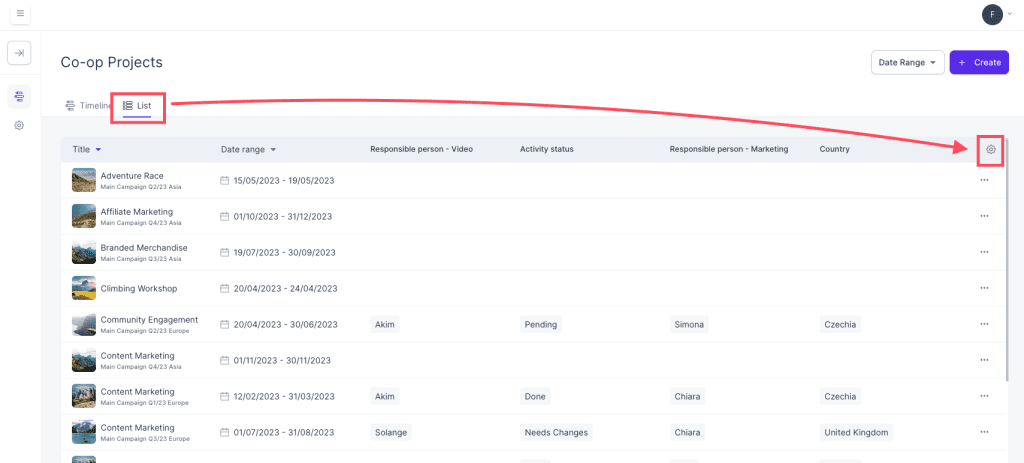
  3. Click on the cogwheel button to the far right on the overview field (located on the sorting line above all the co-op projects), and a new window will open
  4. In this window you can add different sorting and filtering criteria based on your needs. At the very bottom of the window you can add the order of the tabs in the overview window. 
  5. As soon as you are done adding your desired criteria, click on apply at the bottom right to save and apply the changes to you list overview
  6. You have now made changes to the list view
Resources

Knowledge base

Using the list view overview

In order to use the list view overview, follow these steps

  1. Navigate to the Co-op projects overview
  2. In the left hand side of the overview, above Hieracrhy, click on List right next to Timeline (underneath the co-op projects title), and the overview layout changes
  3. In the List view you will have a more detailed view of all the projects available to you.

Here is an explanation to the tab elements you can find in the overview:

  • Title: Title of the project
  • Date range: The date the project revolves around (from-to date)
  • Responsible person – x: The team member responsible for a certain area of the project, for example marketing, design or video
  • Activity status: The current status of the project
  • Country: The country in which the project is related to
  • ‘Cogwheel button’: Allows you to change and restructure the settings tabs in the overview to your own preference
  • Did you know: By clicking on the cogwheel, you can adjust which tabs you would like to see in the overview (as seen above). You can add and remove tabs from the line.

Resources

Knowledge base

Using the date range function

To use the date range functionality, follow these steps:

  1. Navigate to the Co-op projects overview
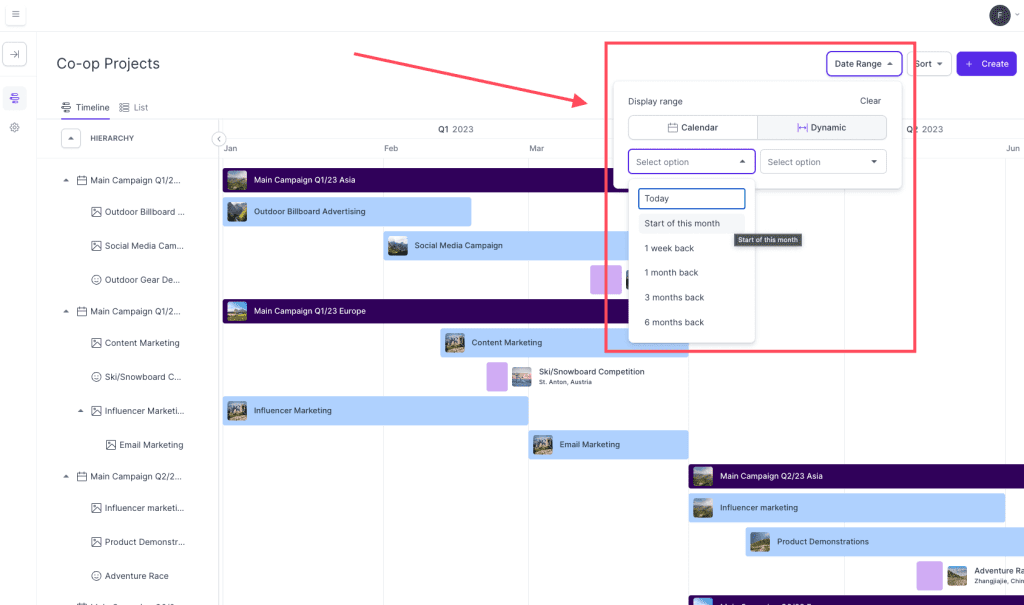
  2. In the top right corner, click on the button that says date range and a new window will open
  3. In this window you can select between two option on how to select a date range:
    1. Calendar – Allows you to select specific dates, for example 01.01.2023 – 31.12.2023
    2. Dynamic – Allows you to select between a set of predefined date ranges, such as today, end of this month or even 6 months back/forward
  4. As soon as you have selected a date range, the co-op projects overview will adjust accordingly and only show projects that are within the date range
  5. To quickly reset back to default setting, click on the button that says clear at the top right of the window (above dynamic)
  6. You have now learnt how to adjust the date using the date range function

Resources

Knowledge base

Deleting/removing an activity

There are different methods for removing an activity. Explore the methods to delete activities below:

  • Method one (Best practice):
  1. Locate the activity in the Co-op projects overview that you would like to remove
  2. Click on the activity and a new window will appear on the right hand side of the page
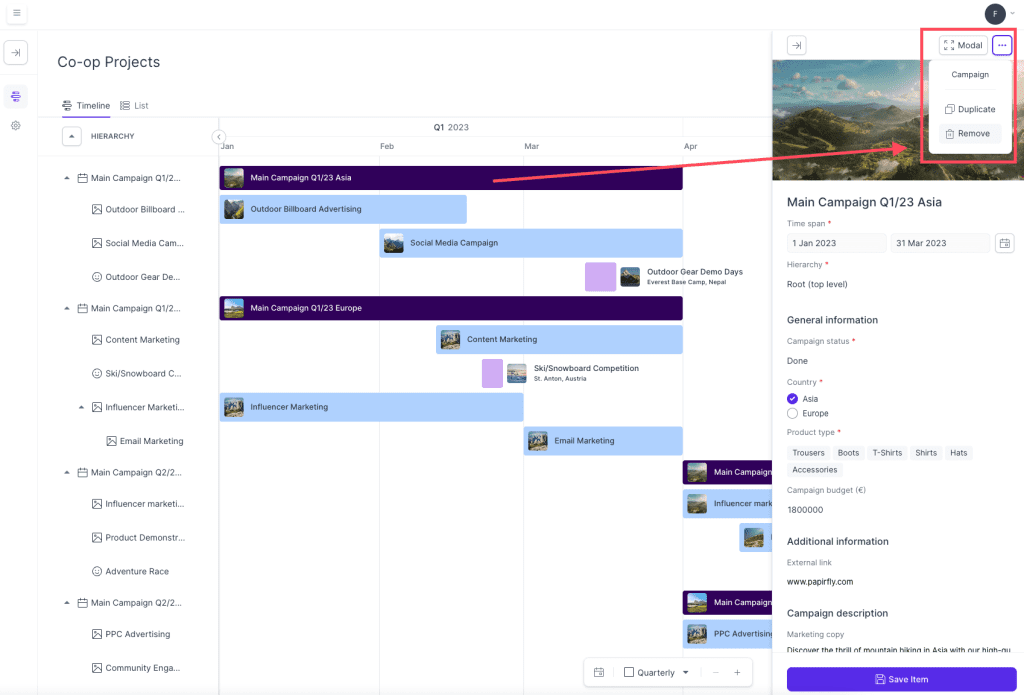
  3. In the top right corner of this window, click on the three dots, and a drop-down menu will appear
  4. In this drop-down, click Remove
  5. You have now removed an activity
  • Method two:

This method is quicker than the first, but it can cause you to accidentally remove an activity you were not meant to remove. We suggest you use the method above to ensure you remove the correct activity.

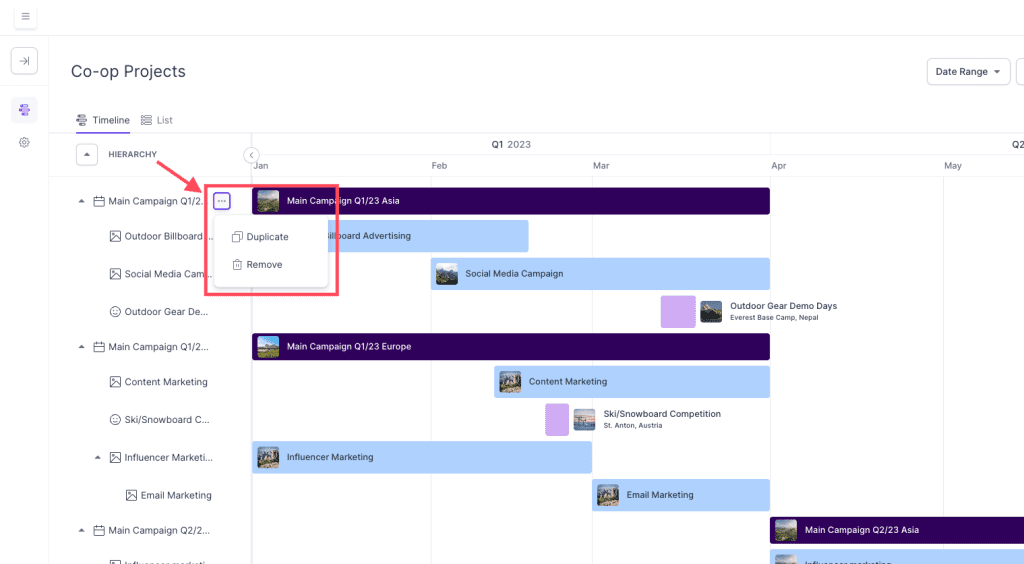
  1. Locate the activity in the Co-op projects hierarchy list that you would like to remove
  2. Hover over the activity in the hierarchy and three dots will appear next to the name of it
  3. Click on the three dots and a small pop-up window will appear next to it
  4. Click Remove
  5. You have now removed an activity

Resources

Knowledge base

Editing an existing activity

To edit an existing activity, follow these steps:

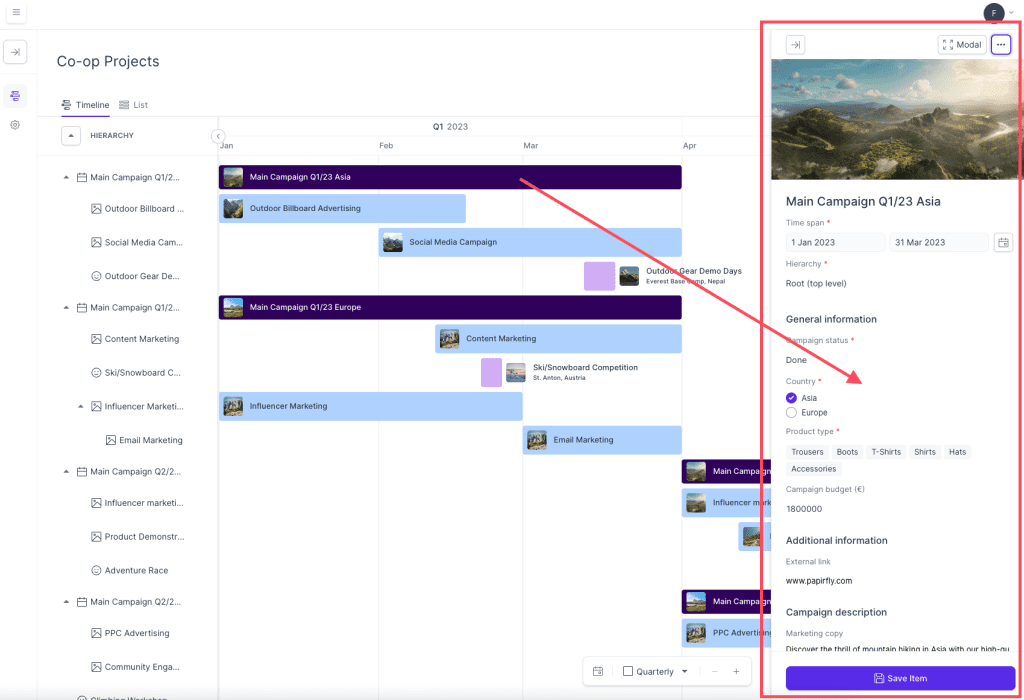
  1. Locate the activity in the Co-op projects overview that you would like to edit
  2. Click on the activity and a new window will appear on the right hand side of the page
  3. In this window, you can edit some of the details of the activity
  4. After you make any adjustments, click on Save item at the bottom
  5. You have now edited an existing activity

Resources

Knowledge base

Change the parent activity of an activity

To change the parent of an activity, follow these steps: 

  1. Locate the activity in the Co-op projects overview that you would like to edit the parent activity of
  2. Click on the activity and a new window opens on the right hand side of the page displaying the details of the activity
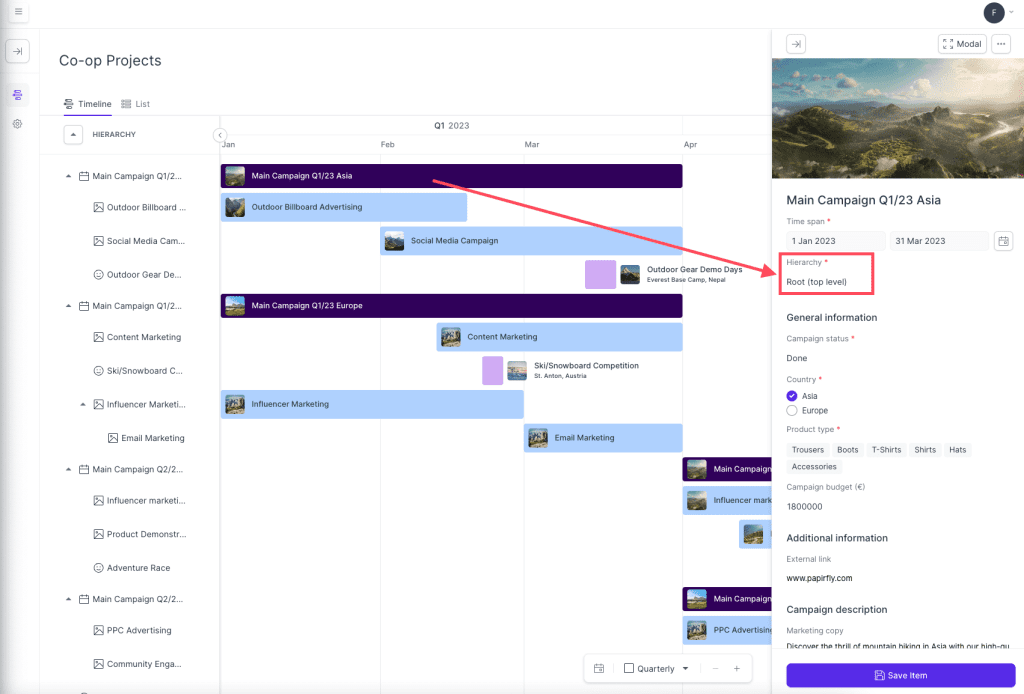
  3. In this window, select the parent activity for the activity under the area called Hierarchy
  4. Click on Save item as soon as you have added/adjusted the parent activity
  5. You have now changed the parent activity
  • Did you know: Adding a parent activity onto another activity places the activity under the parent activity in the overview. It can also change the colour of the activity if this has been configured in the settings. See how the sub-activities are under the parent activity and have a different colour in the screenshot above.

Resources

Knowledge base

Change the duration of an activity

To change the duration of an activity, follow these steps: 

  1. Locate the activity in the Co-op projects overview that you would like to edit the duration of
  2. Click on the activity and a sidebar should open on the right-hand side of the overview
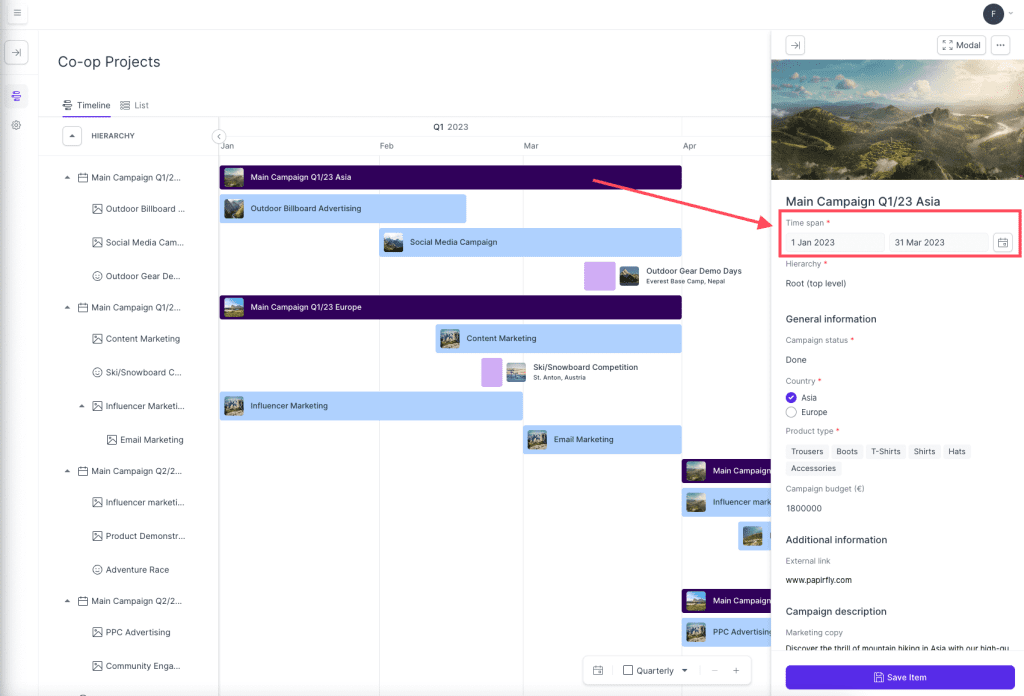
  3. In this sidebar, select the new duration for the activity under time span
  4. Click save item when you are done adjusting the duration
  5. You have now changed the duration of the activity

Resources

Knowledge base

Expanding the overview to see more activities

There are several different ways to see more activities. 

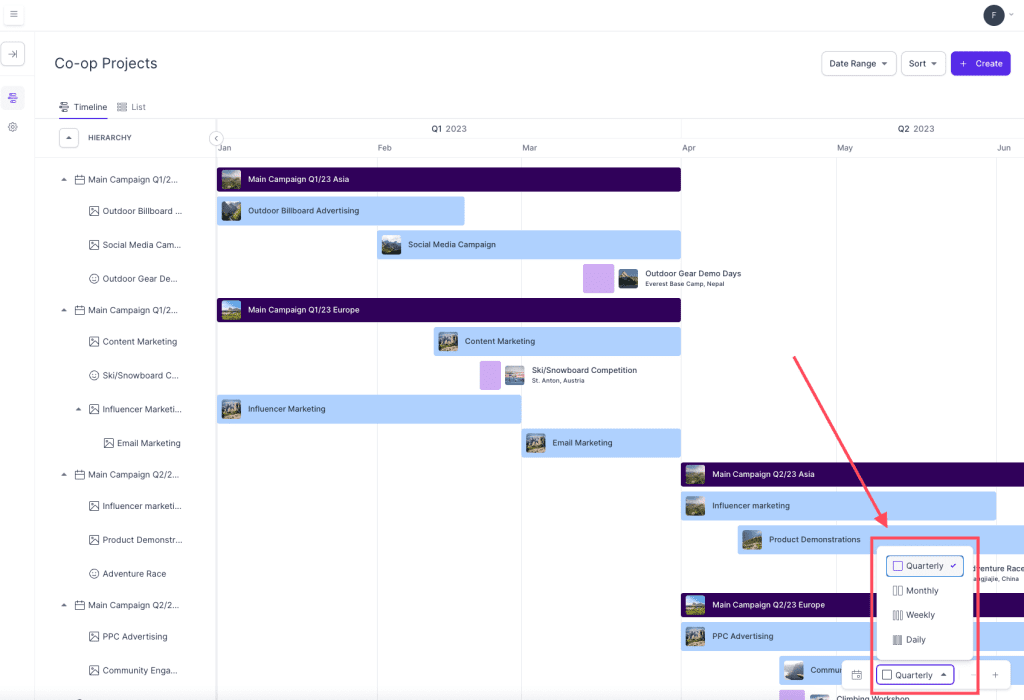
  • Method one – Using the predefined selections: 
  1. In the bottom right corner of the overview, click on the button that says ‘monthly’ and a new drop-down box will appear
  2. In this drop-down box, click on the timeframe you would like to see activities for. You will have these options:
    • Quarterly
    • Monthly
    • Weekly
    • Daily
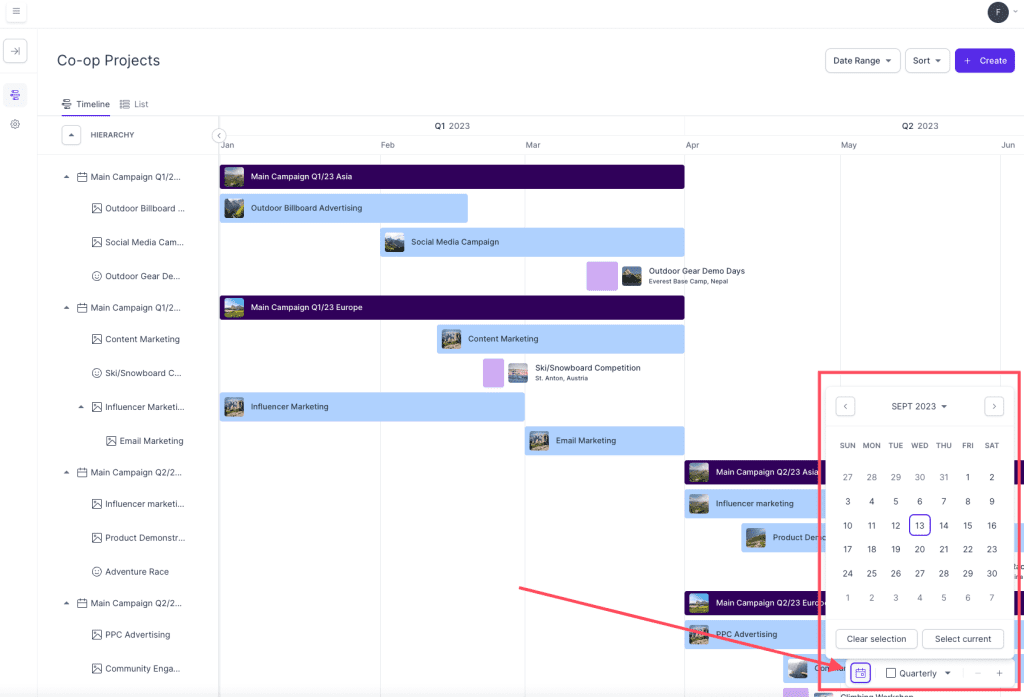
  • Method two – Using the calendar selection tool: 
  1. In the bottom right corner of the overview, click on the calendar symbol, and a window with dates will appear
  2. Select a date that you would like to jump to
  3. You should now see activities at the selected date
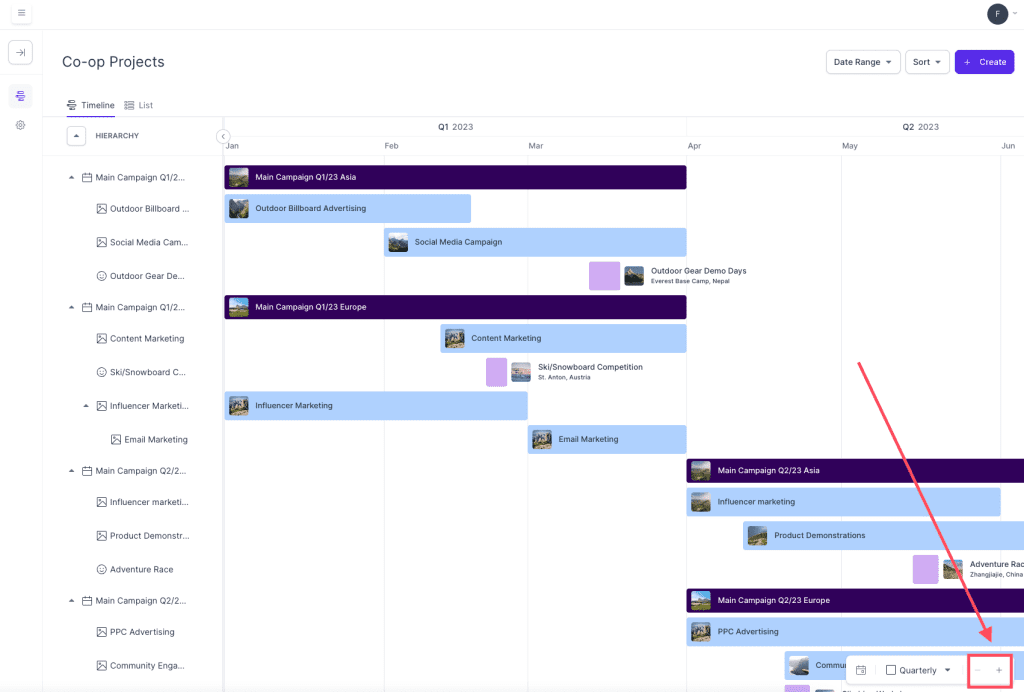
  • Method three – Zooming in or out: 
  1. In the bottom right corner of the overview, click on the minus (-) symbol to zoom out and view more campaigns. 
  2. If you would like to zoom in again, click on the plus (+) symbol
  • Method four – Click and drag
  1. Click and hold the cursor inside the timeline and drag to where you want to go

  • Method five – Using the scroll bar in the browser:
  1. Your browser should allow you to scroll further to the right or left, or up and down
  2. Use the scroll bar at the bottom or on the right hand side of your browser to scroll to the part of the overview that you would like to see
  3. If you do not see a scrollbar, try holding shift on your keyboard and use the scrolling wheel on your computer mouse to perform a horizontal scroll on the overview

Resources

Knowledge base

Viewing activity details

Campaign projects under the product Plan allows you to seamlessly view and manage all of your campaigns activities. Keep all activities organised with our easy-to-use calendar, making sure you and other teams are always up to date.

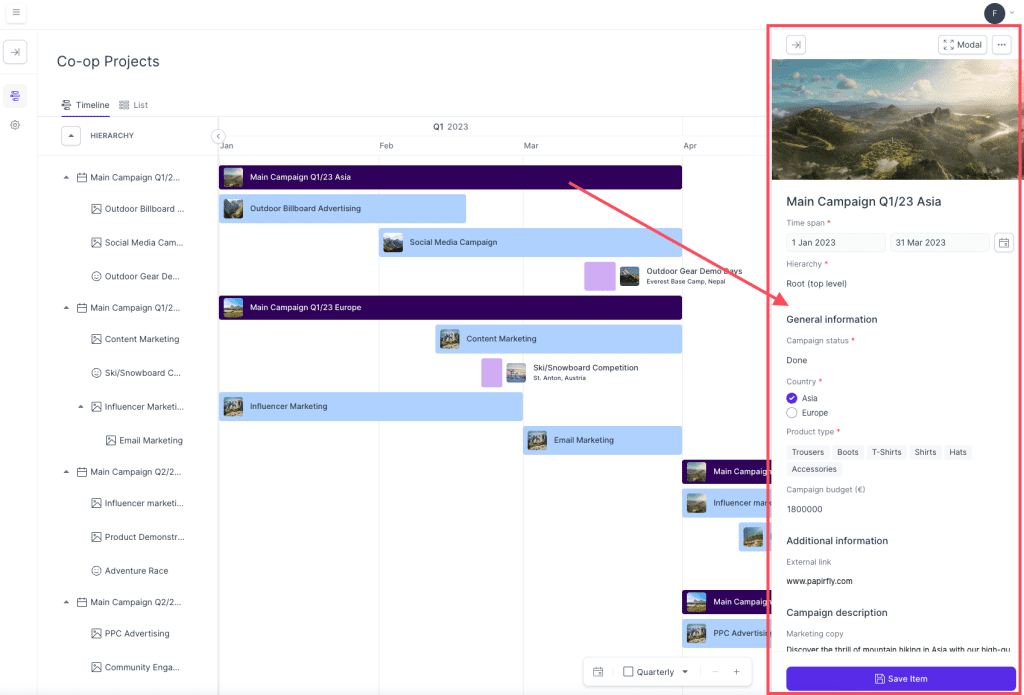
Campaign projects in Plan offers a visual view of all activities that stretch over time to represent the duration of the activities as seen in the screenshot below. By clicking on a specific activity you will be able to view the details of it.

To view all activity details, follow these steps: 

  1. Locate a specific activity in the Co-op projects overview that you would like to see the details of
  2. Click on the activity and a new window will appear in the right-hand side, displaying the details of the activity
  • Did you know: You can adjust some of the settings of the activity directly in this window. If you make any adjustments, remember to click Save item at the bottom of the window.

Resources

Knowledge base

Creating a new activity

Campaign projects under the product Plan allows you to seamlessly view and manage all of your campaigns activities. Keep all activities organised with our easy-to-use calendar, making sure you and other teams are always up to date.

To create a new activity in Campaign projects, follow these steps: 

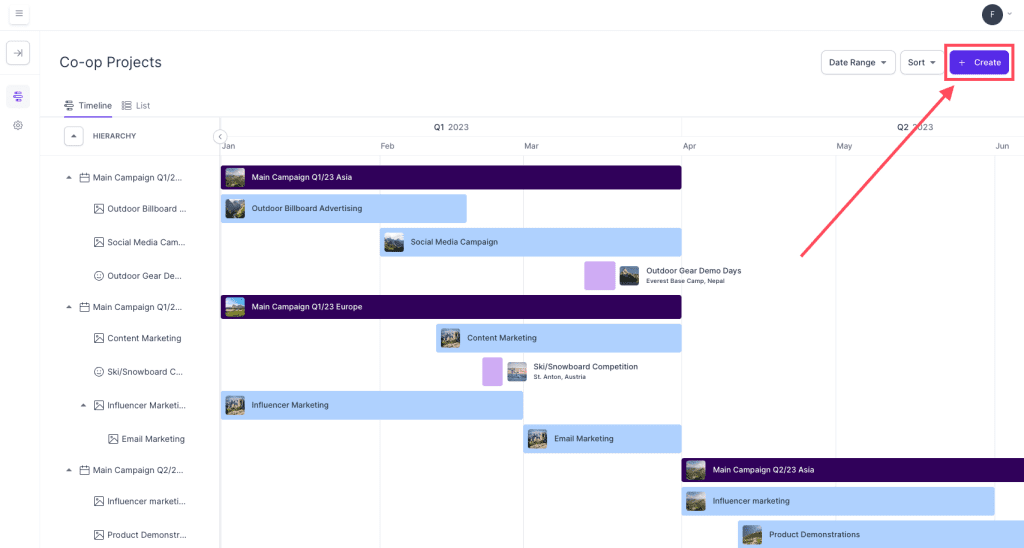
  1. Click on + create in the upper right corner and a drop-down menu will appear
  2. Select the type of activity you would like to create from the list and a sidebar will appear
  3. In the sidebar, fill in the details of the activity. The mandatory details are marked with a red asterisk (red star shape)
  4. As soon as you are done editing the activity, click save item at the bottom of the sidebar menu
  5. You have created a new activity. The activity can be found in the overview on the dates that were set. 

Resources

Knowledge base

Overview of Campaign projects

Campaign projects under the product Plan allows you to seamlessly view and manage all of your campaigns activities. Keep all activities organised with our easy-to-use calendar, making sure you and other teams are always up to date.

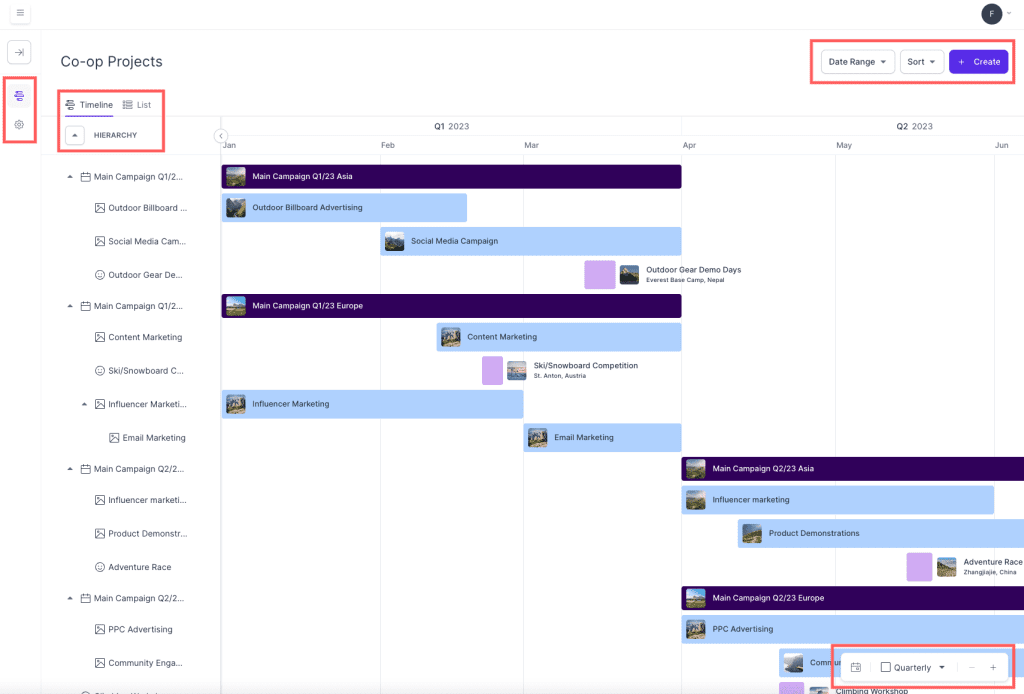
Here are some of the buttons and functionalities you will be able to see when you start using Campaign projects:

  • Overview and cogwheel: Choose if you would like to see all projects or adjust the templates for the campaign project product
  • Template and List: Change between timeline view or list view
  • Hierarchy (drop-down): A list of all currently active and upcoming activities, sorted by date 
  • Date range: Enables you to you select the date that the overall timeline or list view should show 
  • Sort: Allows you to switch sorting by date and alphabetically 
  • + Create: Allows you to create new activities
  • Floating menu at the bottom right: Allows you to quickly zoom in/out. Select your own range or a predefined set of ranges. A longer range is better for viewing activities with a longer duration of timeframe ranges.