Resources
Knowledge base
Uploading assets
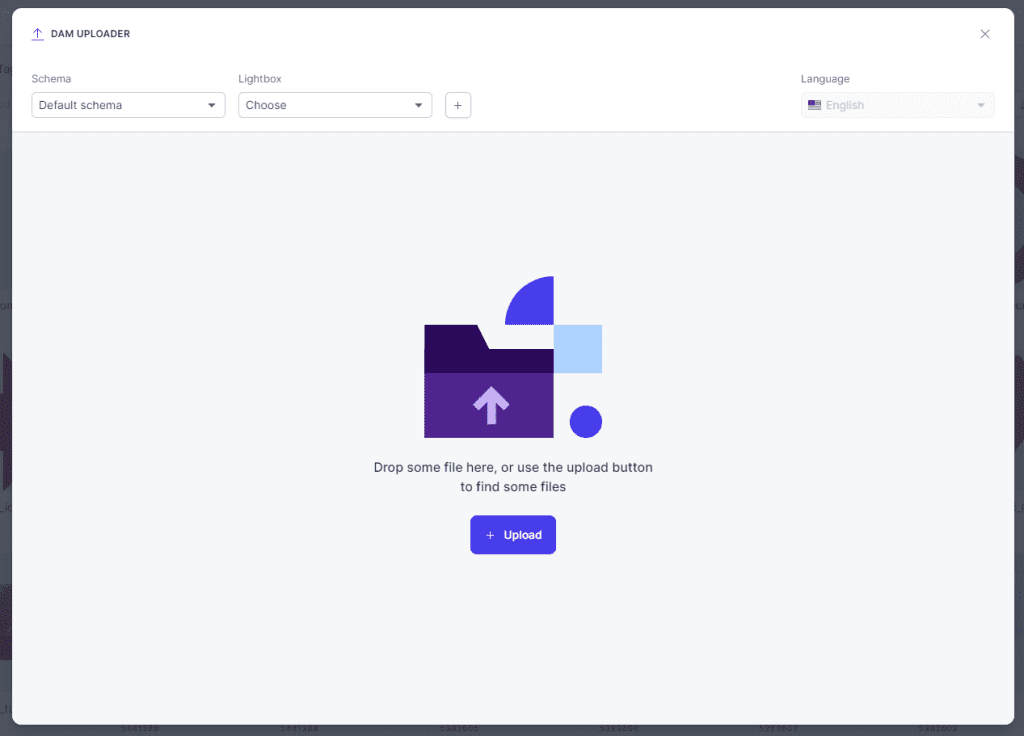
The asset is the most important element in Place, and it all starts with the uploading your assets. We have provided you with multiple methods for uploading that we will explain below.
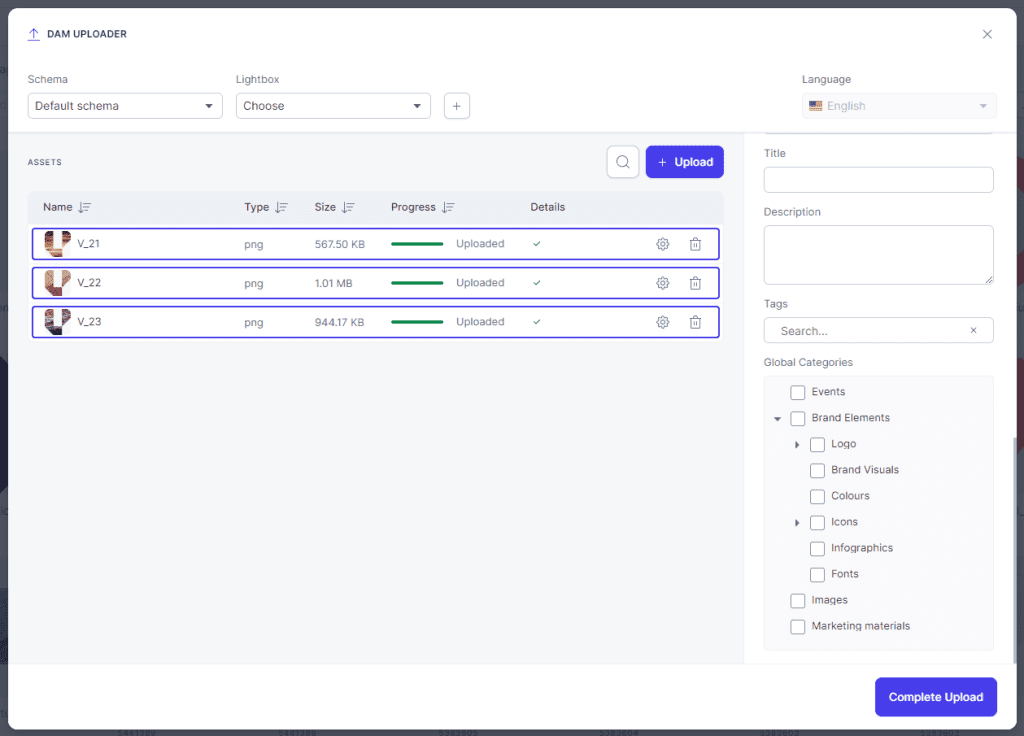
Upload window overview
- + Upload: You can click the upload button to browse for your files, or you can drag and drop them in to the upload area.
- Schema: If the archive have several upload schemas, you can select the schema here. Schemas can be used if you need different meta-data input fields on different type of assets.
- Lightbox/Archive collection: If you have existing Lightboxes/ Archive collections, you can select from them here and upload directly to this collection
- Add lightbox: Press the + button to create a new ligthbox
- Language: The Language index where the meta-data is written.
Upload status overview
- Thumbnail: Hover the thumbnail with your mouse to see a larger preview.
- Type: Shows the file extension of the asset.
- Size: Shows the file size.
- Progression: Shows the progress of the upload.
- Status: Shoes the status of the upload
- Cogwheel: Go to the meta-data options for this single asset.
- Traschan: Delete an asset from the upload process.
- Upload: Add more files to the current upload.
- Search: Search for an asset based on file name.
Adding meta-data while uploading
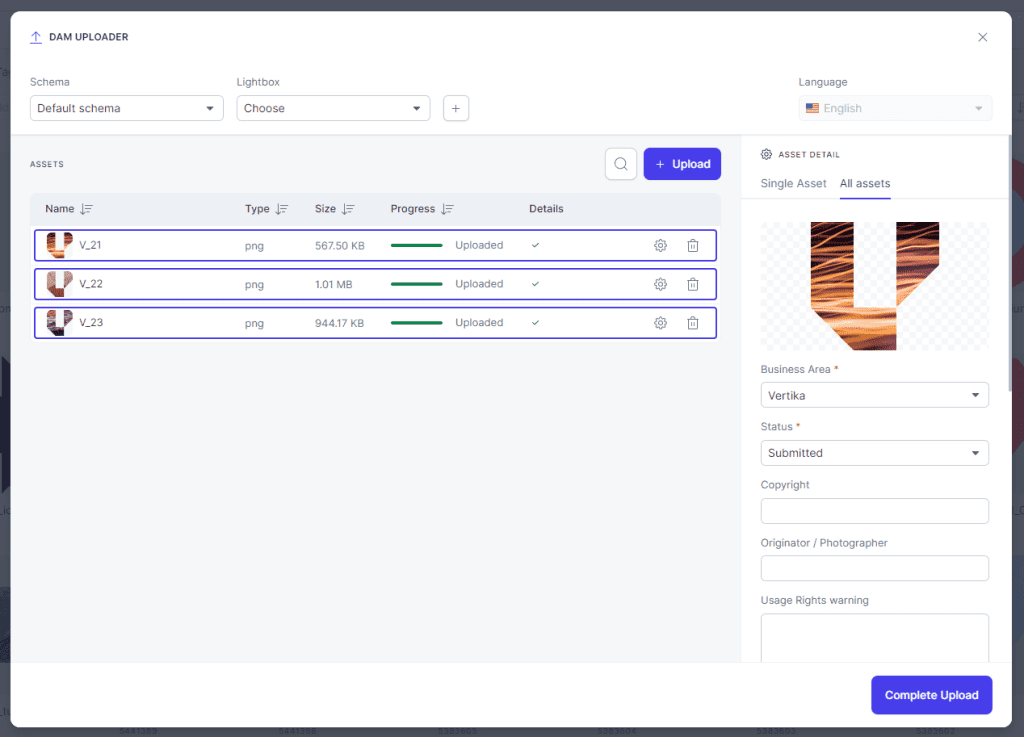
When you have selected a file, the preview panel will pop inn from the right side. Here you can download the different versions of the file available.
When you are on the “All Assets” tab, you apply the same meta-data to all assets.
- All assets: If you go to the single asset tab you can ass meta-data to one specific asset. Press the cogwheel on each asset to enter meta-data for each single asset.
- Single asset: What Business area to the asset belong to.
- Business Area: What status should the assets have when you complete the upload. If you need to add more meta-data later, you can keep it to submitted. If you are happy with your data, set it to approved to publish the files.
- Status: Who has the Copyright of the asset. This field will populate from XMP data if available.
- Copyright: Who is the creator / photographer of the asset. This field will populate with XMP data if available.
- Photographer: When entering a text in this field, a warning label on the given asset will show.
- Usage rights warning: When entering a text in this field, a warning label on the given asset will show.

- Publish date: Set a publish date to decide if the asset should be hidden until a certain date in the future or set todays date if you want it published right away.
- Valid to: If an asset has an expiration date, and you know it upon upload, you can enter the date. This will hide the file at the given date.
- Privacy session: Connect the uploaded assets to a GDPR Privacy photo session.
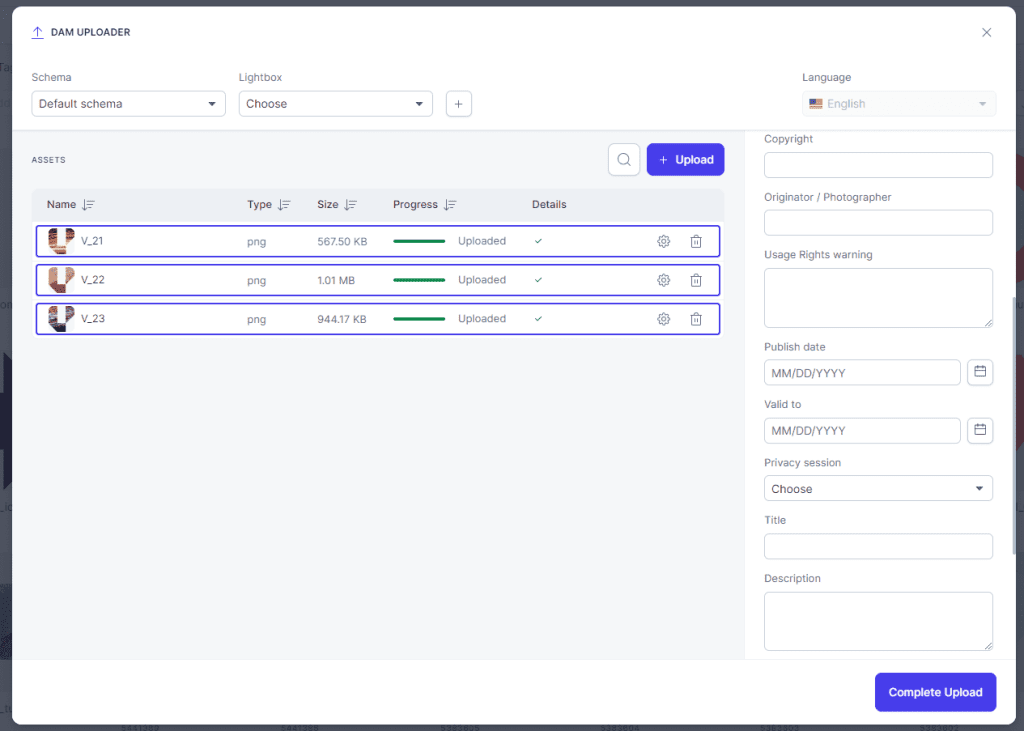
- Title: The title off the asset. Will show under the asset preview in search result.
- Description: Add a brief description of the asset so the users know what it contains, or where the motive of the image is from.
- Tags: Add search tags the file. Enter 3 to 4 tags about what the asset contains/ shows. After writing a tag, press enter to create it.
- Categories: Apply categories to the asset. Here the available categories created by the admins will show.
- Complete upload: When you are happy with your meta-data, complete the upload by pressing the “Complete upload” button.